Showing posts with label organizing. Show all posts

10.27.2011

new closet troubles.

I am having such a difficult time transitioning {closet-wise} from living on my own to moving back home.  My closet at my old apartment was huuuge and now I have a closet this size:

(eeww look at those ugly plastic hangers - need to get on that!)

I've been working on organizing the best I can, but still there is just not enough space. I've had to take things that would normally be in my closet {sweaters, scarves, this little white dresser I have, allll of my shoes} and find creative ways to organize them. I've put my sweaters and scarves in the little dresser and the dresser out in my room. My shoes don't all fit in my closet the way I'd like them to, so I've kept ones I don't wear that often in their boxes out of the way. I also have a large plastic container used for more shoes I don't wear that often that didn't have boxes:


Some of my white ikea kassett boxes are on the shelf above my clothes. The whole closet is pretty poorly-planned - with a single bar way up high and a single shelf, the builders definitely didn't utilize the space effectively. I want my dad to build in another shorter bar somewhere for jeans, skirts, etc. Can you see why I've been posting a lot about gorgeous closets?!  I'm envious!

10.20.2011

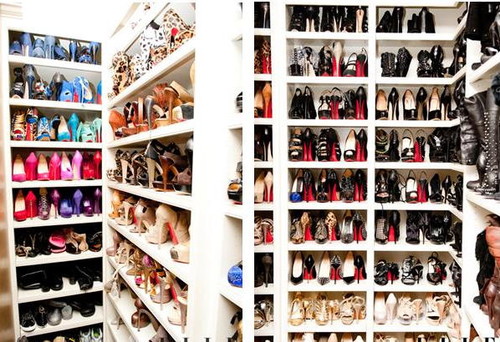
shoes.

Khloe Ks Shoe Closet contemporary closet
contemporary closet design

Ummm can you say Louboutin?  Amazing.   

(I promise I will soon stop posting about closets! :))

9.01.2011

diy {paper covered box}

Found this ugly red box in the $0.99 bin at Staples.  WIN!  I immediately thought of covering it in some beautiful paper.  So, here's the before and after.  With a glue gun and some pretty paper from Papyrus, I turned this:


into this:


Now I just need to decide where to put it! :)

8.03.2011

{inspiration} closets

I think every girl loves her closet, because it is where she stores elements of her personal style.  My closet is so amazingly huge right now, I love it.  Unfortunately, when I move, my closet is going to be quite a bit smaller.  I'm not even sure if all of my stuff will fit! Anyhow, aren't these closets amazing?  I aspire to have a closet like one of these one day...

via here.

via here.

via here.

 via here.


And we can't talk about closets without mentioning this infamous closet:

via here.


A girl can dream!

7.12.2011

an organized drawer.

I did some organizing a while back after I sent my dad with list in hand to Ikea (since we don't have one in SC).  This Godmorgan box was supposed to be used for storing makeup and such, which I needed for my bathroom.  Unfortunately, the box did not fit inside my bathroom drawer.  SO, I decided to use it for organizing my desk drawer!  I don't have a before photo, but I'm sure anyone who appreciates organizing will love this! :)  It makes me happy.


It is actually perfect for organizing a desk drawer - perfect spaces for pens, small objects {erasers, white out, jump drives, paper clips}, post it notes, as well as a hidden compartment! (see last photo).  What do you think?  I'd love to see your [before] and after organizing pics! I'll do better next time with taking a before! Haha!

7.07.2011

diy {cover an ugly tray, part I}

So I bought this lacquer tray from TJ Maxx knowing I wanted to resurface the map design somehow... 


...then I found this pretty paper at Paper Source in georgetown.  My idea was to modge podge the paper onto the tray to cover up the map design.  It was easy, but didn't work out the way I wanted.  Here's how I did it:

-First, I traced the tray onto the back side of the paper and cut out the hexagonal piece.
-Then I had to trim the edges of the paper a bunch in order for it to fit inside of the tray.


-I made sure the paper fit inside, and then put modge podge onto the base of the tray:


(Here is where I realized I should have taped off the edges of the tray, but wanted to see my results faster, so didn't.)
-I placed the paper onto the bottom of the tray, then smoothed out all of the edges and bubbles.  (and there were A LOT of bubbles - so much so that I am seriously considering redoing this project)
-Lastly, I painted modge podge on the top of the paper and set it to dry:


From this picture, you can really see all of the bubbles/creases that formed from the paper being wet.  I'm really disappointed about this.  If you go back and look at the first picture, the paper looks great - I just need to protect it somehow.  SOO I'm thinking about using the first piece of paper I cut (that was a bit too small) on top of what I modge podged, then cover it with a piece of glass cut to fit the tray. 

We'll see.  As I just typed that, it sounded very ambitious with getting the glass and all.  Has anyone done this before? 

Wish I had thought about how wet the paper would get before I started.  Boo.  Here's how it looked when I finished:
The bubbles aren't as evident, but they will still bother me.  For now, though, I think it will have to work.  I'll keep you posted when I decide to finish this. 

6.29.2011

another diy {from Martha}

image and diy via martha stewart.

I was actually just thinking of doing this the other day - I found a good-sized, magnetic closure box from staples on sale for $1.00!  The box is hideous - it is covered in an ugly, red-textured design.  Totally in need of a makeover!  I was going to try using decorative paper to recover, then seal it somehow, but fabric may be a good option too!  Oh, Martha, always there to help us out!

6.26.2011

diy mail sorter {from Martha}

image via Martha Stewart

Paint a wooden pot lid rack and voila! I've been needing a mail sorter, so this will be just perfect!  I may even recruit my dad to saw down the first couple of pegs for shorter pieces of mail and leave the back ones longer for magazines and such.